How to Cook Rice (2026): Ratios, Rice Cooker & Stovetop

Most people who think they’re bad at cooking rice are not bad at cooking rice. They are using the wrong cup.
The plastic cup that comes with a rice cooker is 180ml, not the 250ml Australian metric cup — and the water lines inside the bowl are calibrated to it. Measure your rice with a kitchen cup, fill to the matching line, and you have put in nearly 40% too much rice for the water. The result is hard, undercooked rice, every single time, and nothing in the manual explains why.
This guide covers the ratios for every kind of rice in both a rice cooker and a saucepan, whether rinsing and soaking actually do anything, how to fix rice that has gone wrong, the food safety rules that genuinely matter, and the eight other things a rice cooker will cook.
The short version
- The supplied cup is 180ml. Use it for both the rice and the bowl markings, or measure both in metric cups — but never mix the two.
- Stovetop white rice: 1 cup rice to 2 cups water. In a rice cooker it’s closer to 1:1¼, because a sealed cooker loses almost no steam.
- Rest it for 5–10 minutes after it clicks off. This is the step everyone skips and it is why rice comes out gluey outside and firm in the middle.
- Rinsing does not make rice less sticky. A controlled study found no effect on stickiness or hardness. It does remove dust, husk and about 90% of bio-accessible arsenic.
- Do not rinse arborio or any risotto rice — the surface starch is the point.
- Cooked rice is the one genuine food-safety hazard in a home kitchen. Cool it fast, refrigerate within two hours, eat within two days, reheat once only.
- Never put the bowl in the dishwasher. Both Breville and Zojirushi say so explicitly.
The cup problem, explained properly
Rice cookers are a Japanese invention, and the cup that ships with one is a gō — a traditional Japanese measure of 180ml, holding about 150g of raw rice. An Australian metric cup is 250ml and holds about 200g of rice.
Breville’s Australian manuals state it plainly: “the measuring cup is approximately 150g of rice or 180ml of water”, and one adds that “1 Australian standard metric measuring cup is equal to 200g of uncooked rice”. Zojirushi describes its cup as “about 3/4 of a U.S. measuring cup”, based on the traditional masu.
What this means in practice
The numbered lines inside the bowl assume you measured the rice with the supplied cup. Two supplied-cups of rice, filled to the “2” line, is correct.
Two metric cups of rice filled to the “2” line is about 39% too much rice. That is the single most common reason home-cooked rice comes out hard.
Lost the cup? Measure 180ml of dry rice, or weigh out 150g per “cup”. Breville also gives a weight shortcut on some models: put in 0.5kg of rice and fill to the 0.5L marking.
The other trap: a rice cooker’s “cup” rating is the same unit. A “10 cup” cooker means ten 180ml cups of raw rice, which is a very large amount of cooked rice — not ten metric cups, and not ten servings.
Ratios for every kind of rice
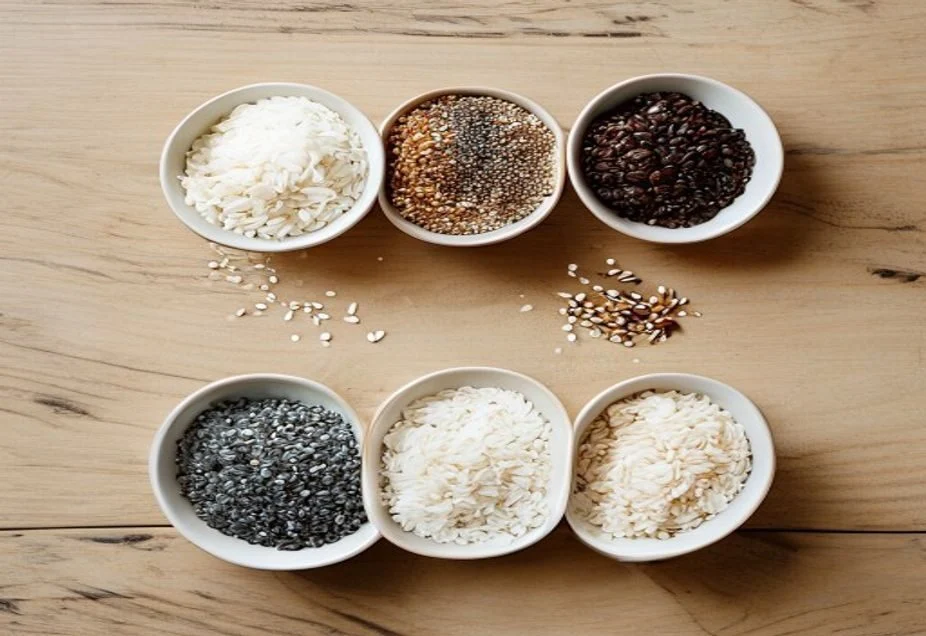
Rice cooker and stovetop ratios genuinely differ, and both are correct. A sealed rice cooker loses almost no steam, so it needs less water. An open-ish saucepan loses water to evaporation the whole time it simmers, so it needs more.
| Grain | Rice cooker | Stovetop | Rinse / soak |
|---|---|---|---|
| White rice | |||
| Long grain white | 1 : 1¼ | 1 : 2 | Rinse. Soak optional |
| Jasmine | 1 : 1¼ | 1 : 2 | Rinse |
| Basmati | 1 : 1½ | 1 : 2 | Rinse. Soak 20–30 min for longer grains |
| Medium grain (Calrose) | Fill to the white-rice line | 1 : 1½–2 | Rinse. Cookers are designed around this rice |
| Short grain / sushi | White or sushi setting | 1 : 1½ | Rinse until the water runs clear |
| Wholegrain and specialty | |||
| Brown rice | 1 : 2, brown setting | 1 : 2, simmer 25 min | Rinse. Soaking helps a lot |
| Red and black rice | 1 : 1¾–2, brown setting | 1 : 2, 30–45 min | Rinse. Soak 30 min. No manufacturer table — treat as brown rice |
| Wild rice | 1 : 1½, brown setting | 1 : 3–4, drain after | Do not rinse. Breville suggests blending it with white or brown rather than cooking alone |
| Glutinous / sticky | 1 : 1¼, sushi setting | Traditionally steamed, not boiled | Rinse and soak — Breville says overnight |
| Arborio | Use the brown-rice table | ~1 : 4 stock, added a ladle at a time | Never rinse. The surface starch is what makes risotto creamy |
| Parboiled / converted | Not recommended — Zojirushi says it goes mushy | 1 : 2–2½, 20–25 min | No rinse needed. Use the stovetop |
| Not rice, but a rice cooker handles them | |||
| Quinoa | 1 : 1¼, quick setting | 1 : 2, simmer 15 min | Rinse — it removes the bitter saponin coating |
| Rolled oats | 1 : 1½, white or porridge setting | 1 : 2–3 | No rinse. Don’t leave on keep-warm |
| Steel-cut oats | 1 : 2½, porridge setting | 1 : 4, 25–30 min | No rinse |
| Couscous | Don’t bother | Pour 1½ cups boiling liquid over 1 cup, cover 10 min | It’s pasta, not a grain. Off-heat is easier and faster |
Two limits worth knowing: most cookers have a minimum as well as a maximum. Zojirushi sets a two-cup minimum for brown rice and three for oats — under-filling gives poor results just as over-filling causes it to boil over.
Should you rinse rice? The honest answer
The folklore says rinsing removes starch and stops rice going sticky. The evidence does not support that particular claim.
A controlled study covered by The Conversation found that washing had no effect on the stickiness or hardness of the cooked rice. Stickiness comes from amylopectin released during cooking, which is determined by the variety — short grain is sticky because it is short grain, not because you didn’t rinse it.
What rinsing genuinely does:
- Removes dust, husk fragments and the occasional stone. The original and best reason.
- Removes up to 20% of microplastics and around 90% of bio-accessible arsenic, though it also washes out some copper, iron and zinc.
- Prevents a starch film forming on the inside of the cooker pan — Zojirushi’s stated reason, and a real one if you want to keep the bowl nice.
- Does not affect bacteria, and does not make rice fluffier by removing stickiness.
So: rinse most rice, briefly, because it’s cheap insurance and it keeps your cooker clean. Do it in two or three quick changes of cold water rather than a long soak-and-drain. Then drain it properly — Breville warns that rice still wet from rinsing adds water you haven’t accounted for, which is a quiet cause of soggy results.
Do not rinse arborio and other risotto rices, paella rice, or rice for rice pudding — all three depend on that surface starch for creaminess. Don’t rinse wild rice or oats either.
Soaking
Soaking hydrates the grain before it hits the heat, so it cooks more evenly from the outside in. Zojirushi’s own description of a proper rice cycle is telling: rice “must be soaked for about 30 minutes, cooked, and steamed for about 15 minutes” — and their fuzzy-logic cookers do all three automatically. A basic on-off cooker does not, which is why a 30-minute soak improves cheap cookers noticeably.
- Worth soaking: brown rice, red and black rice, basmati (20–30 minutes, and it helps the grains elongate), glutinous rice (hours, or overnight).
- Optional: long grain and jasmine white rice.
- Skip: oats, couscous, quinoa.
How a rice cooker knows when it's done
This is a genuinely elegant piece of engineering, and understanding it explains most rice-cooker behaviour.
Underneath the bowl sits a small magnet holding a spring-loaded switch closed. While there is still free water in the pot, the contents cannot get hotter than about 100°C — all the extra energy goes into turning water into steam, not raising the temperature. The moment the last free water is absorbed or boiled off, the temperature shoots up. At roughly 103°C the magnet’s alloy reaches its Curie point, abruptly loses its magnetism, the spring wins, the switch flips, and the cooker drops to keep-warm.
That is the whole mechanism on a basic cooker. It doesn’t know about rice — it knows about water. Which explains three things: why the ratio matters so much, why a dirty heating plate causes burning (debris creates hot spots that trip the switch early), and why the rice is not actually finished when it clicks.
The five minutes that fix everything
When the switch flips, the water is gone but the grains are still uneven — wet on the outside, drier in the core. Leave the lid closed and rest it for 5 to 10 minutes. The residual heat redistributes the moisture and the texture evens out.
SunRice says 5 minutes; Breville says an extra 10 on keep-warm gives “extra fluffy rice”; the stovetop rule is 5 to 15. Skipping the rest is the single most common cause of rice that’s gluey on the outside and firm in the middle — and it costs nothing to fix.
Then fluff with a fork or the paddle, don’t stir with a spoon.
Cooking rice on the stove
You don’t need a rice cooker. The absorption method works perfectly in any saucepan with a lid.
- Rinse the rice under cold water until it runs mostly clear, then drain well.
- Use a heavy-based pan with a tight lid. The heavy base stops the bottom scorching; the tight lid keeps the steam in. These two things matter more than any technique.
- Add water at 1 cup rice to 2 cups water for long grain, jasmine, basmati and brown rice. Use 1 to 1½ for sushi and medium grain.
- Bring to the boil uncovered.
- Cover, drop to the lowest heat your stove will do, and simmer 10–15 minutes for white rice or 25 for brown — without stirring.
- Take it off the heat and stand it, still covered, for 5–15 minutes.
- Fluff and season. Salt at the end — salt slows how much water the grains absorb.
Do not lift the lid. The last third of the cooking is done by trapped steam. Every peek dumps that steam and drops the pan below the temperature it needs, so the top layer stays hard while the base scorches. Trust the timer.
The other two methods
- The draining method. Cook rice like pasta — 1 cup rice in 6 cups of boiling water, simmer, then drain through a sieve. SunRice publishes this as their boiling method. It’s forgiving because you never have to get the ratio right, it gives firmer, more separate grains, and it’s the method that reduces inorganic arsenic the most — studies put the reduction at roughly 40–60%. The trade-off is that it also washes out some water-soluble nutrients.
- The microwave. Works well for one or two serves. Rice and water in a container far larger than you think you need — boil-over is the only real risk — roughly 10 minutes on high then 10 on medium, then stand. Useful if you have no stove, which is more common in Australian student housing than you’d expect.
When it goes wrong
| Problem | Why | Fix |
|---|---|---|
| Hard, undercooked | Almost always the cup mismatch — metric cup of rice against a 180ml-calibrated water line. Or the wrong programme for brown rice | Add 2–3 tbsp hot water, close the lid, run 5 more minutes. Next time match the cup to the bowl |
| Wet and mushy | Too much water, or rice added still dripping from the rinse | Drain rinsed rice properly. Leave the lid ajar on keep-warm for a few minutes to drive off steam |
| Burnt on the bottom | Debris on the heating plate or the outside of the bowl, creating hot spots. Or too little water | Wipe the heating plate and the outside of the bowl before every use. Breville is explicit that this is needed for proper contact |
| Gluey | Variety, too much water, stirring during cooking, or no rest | Use long grain or basmati for separate grains. Never stir. Rest 5–10 min |
| Raw in the middle | Rice not spread level, under the cooker’s minimum load, or no soak on brown or black rice | Spread the rice flat across the base. Respect the minimum. Soak wholegrain rice |
| Boiling over | Over the MAX line, or a starchy ingredient like oats or lentils foaming | Stay under MAX. Clean the steam vent — it’s removable on most cookers. A teaspoon of oil cuts the foam |
Rice safety: the one that genuinely matters
Of everything in a home kitchen, cooked rice is the food most worth understanding properly — because the danger is counter-intuitive and reheating does not fix it.
Raw rice carries Bacillus cereus spores. FSANZ puts it directly: this bacterium “can form spores and toxins that are not destroyed by cooking or boiling“. The spores survive the cook. If the cooked rice then sits at room temperature and cools slowly, the spores germinate, multiply, and some strains produce a toxin.
Why reheating doesn’t save you
The Food Safety Information Council states it plainly: “Reheating or cooking the food will not destroy this toxin as it is resistant to heat.”
The vomiting-type illness has a fast onset — 30 minutes to 5 hours — and rice is the food most commonly associated with it. WA Health adds the part that makes it genuinely dangerous: “There is no way of telling if cooked rice is contaminated — it will not look, taste or smell different.”
The hazard is the cooling step, not the reheat. Rice left on the bench for hours cannot be rescued by any amount of heat.
What to actually do
- Cook what you need. The simplest control, and the one WA Health lists first.
- Either keep it above 60°C or get it below 5°C. The zone between is where the problem happens. A rice cooker’s keep-warm holds above 60°C, which is why leaving it on is safer than turning it off and walking away — though quality drops after 5 to 8 hours and 12 is most manufacturers’ limit.
- Cool it fast. WA Health is specific: tip it out of the hot pot and spread it into shallow containers less than 10cm deep, kept separate rather than stacked. Or cool it in a colander under cold running water.
- Refrigerate within 2 hours, ideally much faster. SunRice adds a detail people get wrong: do not put hot rice into a closed container in the fridge — the sealed container insulates it and slows cooling, which is exactly what you’re trying to avoid.
- Eat within 2 days. Both the NSW Food Authority and SunRice say two days for rice specifically, which is shorter than the three days for general leftovers.
- Reheat once, to steaming hot right through. Never twice. Every cook-cool-reheat cycle passes back through the danger zone.
- Freezing works well — up to three months. Portion it flat in bags with the air pressed out, label it, and defrost in the fridge.
- Be careful with takeaway rice. The NSW Food Authority warns that some businesses pre-cook rice and reheat it to serve, so eat it soon after buying rather than saving it for tomorrow.
Remember too that the 2-hour/4-hour rule is cumulative — the time adds up across every occasion the food has been out of the fridge, not just the most recent one. Our guide to cheap healthy meals covers the full set of meal-prep safety rules.
What about arsenic in rice?
This comes up a lot and deserves a calm answer rather than either alarm or dismissal.
Arsenic occurs naturally in soil and water, so trace amounts in food are, as FSANZ puts it, “unavoidable”. The Food Standards Code sets a limit of 1mg/kg total arsenic for cereals including rice. Australia’s monitoring — the 25th Australian Total Diet Study, plus a 200-product survey of rice and rice-based foods — found levels “consistent with international studies and lower than maximum levels”, and specifically that inorganic arsenic in Australian rice products was low compared with comparable overseas studies.
On infant rice products, FSANZ is unambiguous: “parents and caregivers should not be concerned about the safety of rice-based infant food products available for sale in Australia.” Worth noting for context that Australia’s limit for cereals is higher than the EU and US limits set specifically for infant rice cereal, and FSANZ addresses that directly — its limits “reflect data and analysis unique to the Australian environment and food supply”.
FSANZ’s advice for anyone eating a lot of rice is not to avoid it, but to eat a varied diet. If you want to reduce it anyway, the two levers are free: rinsing removes around 90% of the bio-accessible arsenic, and the draining method cuts inorganic arsenic by roughly 40–60%.
What else a rice cooker will cook
This is where a rice cooker earns its bench space, especially in a share house with one hotplate. Below, “supported” means a manufacturer publishes times for it; “hack” means people do it successfully but no manufacturer backs it.
| What | Status | How |
|---|---|---|
| Steamed vegetables | Supported | 4 cups water in the bowl, food in the basket. Broccoli 13–16 min, carrots 20–25, pumpkin 24–29, potatoes 40–50, frozen peas 12–15. The water must not reach the tray. |
| Porridge and oats | Supported | Breville’s porridge setting: 2 cups oats to 3 cups milk or water, 9 minutes. Stay under the max or it foams over |
| Quinoa | Supported | 1 : 1¼ on the quick setting. Don’t leave it on keep-warm |
| Poached / steamed chicken | Supported | In the steaming basket: breast 22–25 min, thigh 28–32, drumstick 35–40. Single layer, similar sizes, juices must run clear |
| Steamed dumplings | Supported | Frozen 20–25 min, fresh 25–29. Put baking paper or a lettuce leaf underneath so they don’t stick |
| Soup | Supported | Breville’s soup function runs 30–180 minutes. Keep well under the max volume |
| Cake | Supported on some | Only if your cooker has a cake function. Zojirushi warns to avoid baking powder and bicarb — they cause overflow |
| Hard-boiled eggs | Partly supported | Tiger publishes a recipe; most brands don’t. Steam them in the basket rather than boiling them loose — fewer cracked shells |
| Dhal and lentils | Hack | Works on the soup setting, but pulses foam heavily. Zojirushi says beans need different times and soaking, so their settings aren’t suited to it. Pre-soak, stay well under max, add a little oil |
| Pasta | Don’t | Highest boil-over risk of anything here — starch foam, a sealed lid, and a thermostat that will cut out as the water drops. Use a saucepan |
The genuinely useful trick is steaming vegetables in the basket while the rice cooks underneath. It’s real, and it turns one appliance into a whole meal — but the timings rarely line up, so add the basket partway through rather than at the start. Brown rice takes an hour; broccoli takes fifteen minutes.
Cleaning it, and what wrecks the bowl
- Never put the inner bowl in the dishwasher. Breville: “dishwashers use harsher cleaning detergents and high water temperatures that could damage or distort parts of the rice cooker.” Zojirushi says its parts are simply not dishwasher safe.
- Wooden or plastic utensils only. Metal spoons scratch the non-stick, and a scratched bowl sticks and burns forever after.
- Wipe the heating plate and the outside of the bowl before every use. The most-skipped step, and the direct cause of burnt bottoms.
- Clean the steam vent. It usually pulls apart into two pieces and collects starch. A blocked vent is what makes a cooker spit.
- Wash the lid seal every time — it traps condensate and goes sour.
- Baked-on rice: fill the bowl with hot soapy water and leave it 10 minutes. Never a scourer.
- Never immerse the housing or the cord.
Buying a rice cooker in Australia
The good news for anyone on a budget: CHOICE tested 20 models from $15 to $350 and found several cheap ones that performed genuinely well. Its verdict was that there are examples from Big W and Kmart’s Anko range that “scored relatively well in our performance tests and will leave you with change from a $50 note”, with one earning a CHOICE recommendation and outperforming more expensive models.
| Where | Model | Price |
|---|---|---|
| Big W | Brilliant Basics rice cooker | $14 |
| Kmart / Target | Anko 1.5 cup mini — CHOICE scored it 83%, enough for 1–2 people | $15 |
| Kmart / Target | Anko 10 cup | $39 |
| Big W | Contempo 10 cup with steamer | $39 |
| Aldi | Ambiano digital 10 cup, 10 presets (Special Buys) | ~$59 |
| Breville | The Rice Box Pro | ~$127 |
| Tefal | Rice Master IH 1.8L | ~$179 |
| Tiger / Zojirushi | Japanese fuzzy-logic and pressure IH models | $250–$660 |
Remember the capacity unit: a “10 cup” cooker means ten 180ml cups of raw rice. That is a lot — roughly enough cooked rice for eight to ten people. For one or two, a 1.5 to 3 cup model is genuinely plenty and takes far less bench space.
The step up in price buys you fuzzy logic — a microprocessor that soaks, cooks and steams in stages and adjusts to the load, rather than the simple magnet switch. It makes a real difference to brown rice and to sushi rice. It makes very little difference to plain white rice, which is what most people cook. Buy the $15 one first, and upgrade only if you find yourself cooking rice daily.
Where to buy rice cheaply
Here’s a finding that goes against the usual advice. For jasmine rice, the supermarket home brand actually beats online Asian grocers: a 5kg bag of home-brand jasmine runs about $2.40–2.70 a kilo at Woolworths or Coles, against $3.44–4.20 a kilo for branded 10–20kg bags from online Asian suppliers, where freight on a heavy item eats the bulk discount.
- Jasmine, long grain, medium grain: supermarket home brand in the biggest bag. About $2.40–2.70/kg.
- Basmati: the reverse — supermarket basmati is dear at around $3.60/kg, and Indian and Pakistani grocers usually beat it comfortably on 5–10kg bags of aged basmati.
- Sticky, black, sushi and short grain: Asian grocers, which stock varieties supermarkets simply don’t. Our suburb guide to Asian, Indian and African grocers lists them city by city.
- In store beats online for big bags. The freight on 20kg is what kills the online price.
One thing worth knowing about the biggest name on the shelf: SunRice is an Australian co-operative, founded in 1950 by Riverina growers, and Australian rice is grown in the Murrumbidgee and Murray valleys of southern NSW. But SunRice is now a global business that also sources internationally, and Australian rice production swings wildly with water allocations — in drought years much of the rice under that brand is imported. If origin matters to you, read the country-of-origin label rather than the brand.
Eight things to cook in a rice cooker
Costs are per serve at Australian supermarket prices as at July 2026. Cup measurements here are the supplied 180ml cup unless stated.
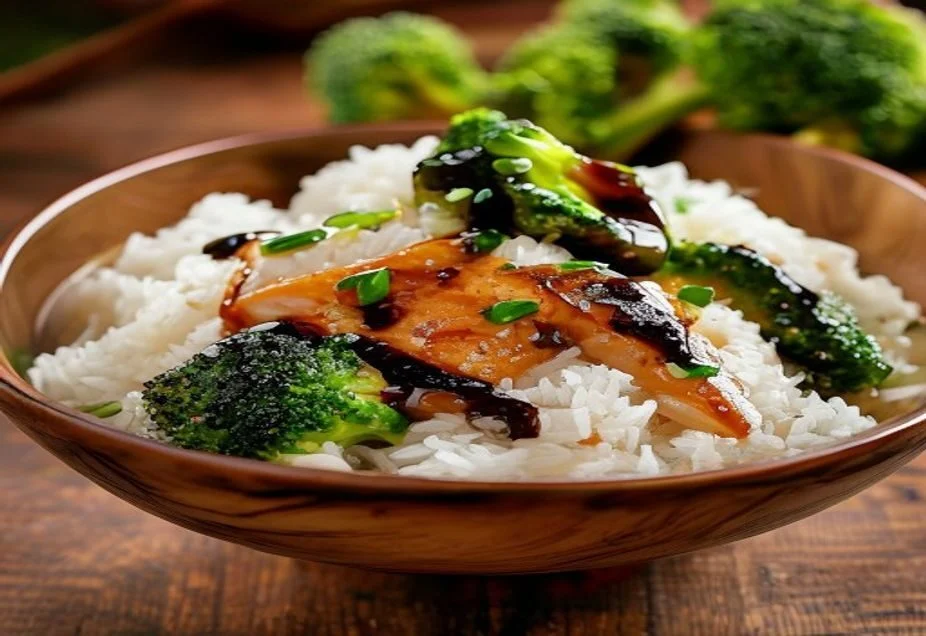
Rice That Actually Works
Ingredients
- 2 supplied cups jasmine or long grain rice
- Water to the “2” line (about 2½ cups)
Method
- Rinse in two or three changes of cold water. Drain properly — wet rice adds water you haven’t counted.
- Wipe the heating plate and the outside of the bowl. Add rice, spread it level, fill to the line.
- Cook. When it clicks, wait 5–10 minutes with the lid shut.
- Fluff with a fork, never a spoon.
One-Pot Chicken and Rice
Ingredients
- 2 supplied cups rice, rinsed
- 4 chicken drumsticks or 2 thigh fillets, diced
- 1 onion, 2 cloves garlic, 1 carrot, diced small
- 2½ cups chicken stock · 1 tsp paprika
- 1 cup frozen peas
Method
- Put the rice, vegetables, spices and stock in the bowl. Stir once and level it.
- Lay the chicken on top. Close and cook on the white rice setting.
- When it clicks, stir the frozen peas through and rest 10 minutes on keep-warm — that finishes the peas.
- Check the chicken reads 75°C and the juices run clear.
Rice Cooker Dhal
Ingredients
- 1½ metric cups red lentils, rinsed
- 1 onion, 2 cloves garlic, diced
- 1 can diced tomatoes
- 2 tsp cumin, 2 tsp coriander, 1 tsp turmeric
- 4 cups water · 1 tsp oil
Method
- Everything in at once. Stay well under the max line — lentils foam.
- Cook on the soup setting for 40 minutes, or run the white rice cycle twice.
- Stir, season, and add water if it’s thicker than you want.
Steamed Chicken and Greens over Rice
Ingredients
- 1 supplied cup rice, water to the “1” line
- 1 chicken breast fillet, butterflied
- 200g broccoli or bok choy
- Soy sauce, sesame oil, grated ginger
Method
- Start the rice. Rub the chicken with ginger and a splash of soy.
- After about 5 minutes, put the chicken in the steaming basket on top and close the lid.
- Add the greens for the last 8 minutes — broccoli only needs 13–16, and adding it early turns it grey.
- Rest 5 minutes. Chicken must read 75°C. Dress with soy and sesame oil.
Overnight-Free Porridge
Ingredients
- 2 metric cups rolled oats
- 3 cups milk, or milk and water
- Pinch of salt · cinnamon
- Banana, honey or peanut butter to finish
Method
- Oats, liquid and salt in the bowl. Stir.
- Porridge setting, 9 minutes. Stay under the max — oats foam and overflow easily.
- Stir well and top. Don’t leave it on keep-warm; it sets solid.
Egg Fried Rice
Ingredients
- 4 cups cold, properly refrigerated cooked rice
- 3 eggs, beaten · 1 onion, 2 cloves garlic
- 300g frozen peas and corn
- 3 tbsp soy sauce · oil
Method
- Scramble the eggs in a hot pan, set aside.
- Fry the onion and garlic, add the frozen vegetables, 3 minutes.
- Add the cold rice, break up the clumps, fry hard 4–5 minutes.
- Return the egg, add soy, toss.
Coconut Rice
Ingredients
- 2 supplied cups jasmine rice, rinsed
- 1 can coconut milk (400ml)
- Water to bring the liquid to the “2” line
- ½ tsp salt · 1 tsp sugar
Method
- Rice in, then the coconut milk, then top up with water to the normal line. The coconut milk counts as part of the liquid, not extra.
- Add salt and sugar, stir once.
- Cook, then rest 10 minutes and fluff.
Quinoa and Roast Veg Bowl
Ingredients
- 1½ metric cups quinoa, rinsed well
- Water at 1 : 1¼
- 1 can chickpeas · roast or steamed vegetables
- Lemon, olive oil, salt
Method
- Rinse the quinoa thoroughly — the coating is genuinely bitter if you don’t.
- Cook on the quick setting, 1 : 1¼. Don’t leave it on keep-warm.
- Steam vegetables in the basket at the same time, or roast them separately.
- Fold through the chickpeas, dress with lemon and oil.
The short answer to most rice problems
- Use the supplied cup for the rice. The bowl markings assume it. This alone fixes most complaints.
- Drain rinsed rice properly. Water clinging to the grains is water you didn’t measure.
- Spread the rice level before you close the lid.
- Wipe the heating plate and the outside of the bowl every time.
- Don’t lift the lid. Not on the stove, not in the cooker.
- Rest it 5–10 minutes after the click, then fluff with a fork.
- Cool leftover rice fast and refrigerate it. Shallow containers, within two hours, eaten within two days, reheated once.
Rice is the cheapest thing you can build a meal on — about 30c a serve from a 5kg bag — and it is the base for most of the recipes in our guide to cheap healthy meals in Australia, which costs out ten dinners from around $1 a serve. If you’re setting up a kitchen from scratch, that guide also covers what to buy and what to skip.
And if you want the other appliance most Australian kitchens now have, our air fryer times and temperatures chart covers fifty foods in Celsius. The two complement each other neatly: a rice cooker handles everything wet, an air fryer everything crisp.
Frequently asked questions
You May Also Like

Moving to Australia: The Complete Checklist and Guide (2026)

NT Public Holidays 2026: Full Calendar, Dates and How Darwin and Alice Springs Celebrate